Welcome to A Stampers Paradise!

You've stumbled upon my escape from the daily grind! I hope you enjoy what you see here. I am a SU Demo who loves trying new techniques, holding card making classes, creating techniques of my own, and most recently blog design, I love anything stamping related! I hope you'll stay a minute and come again! I'd love to know you were here, so feel free to leave comments!

Showing posts with label Pocket Cards. Show all posts


Sunday, April 17, 2011

Gettin' Sketchy with it...

 I have been making this size card for a while now, and it's probably my favorite size! They are perfect to hold money, gift certificates and notes folded up inside. It measures 4"x8" and has a 2" pocket inside. I start with an 8" x 10" sheet of cardstock and score the long side at 2" and 6". This gives you three sections, and the short one gets glued in the corners to make the pocket. So easy! I used Early Edition DSP by SU as the background paper on this card. I LOVE this paper! This particular sheet happens to be an encyclopedia type page all about Cherry Blossoms, facts and info about them, what they represent, where they grow, etc. It was so fitting for the image! The black 1/2 pearls in the bottom right corner are SU Basic Pearls colored a few times with a Black Sharpie. I never need more than one coat for other colors, but black is really purple, so it takes a few times to get it dark. I LOVE coloring on both the Pearls and the Rhinestones! The shape in the left is a Labels Die from Nestabilities. It's cut, then embossing and sponged in the center, leaving the outside ridge uninked. Love it!
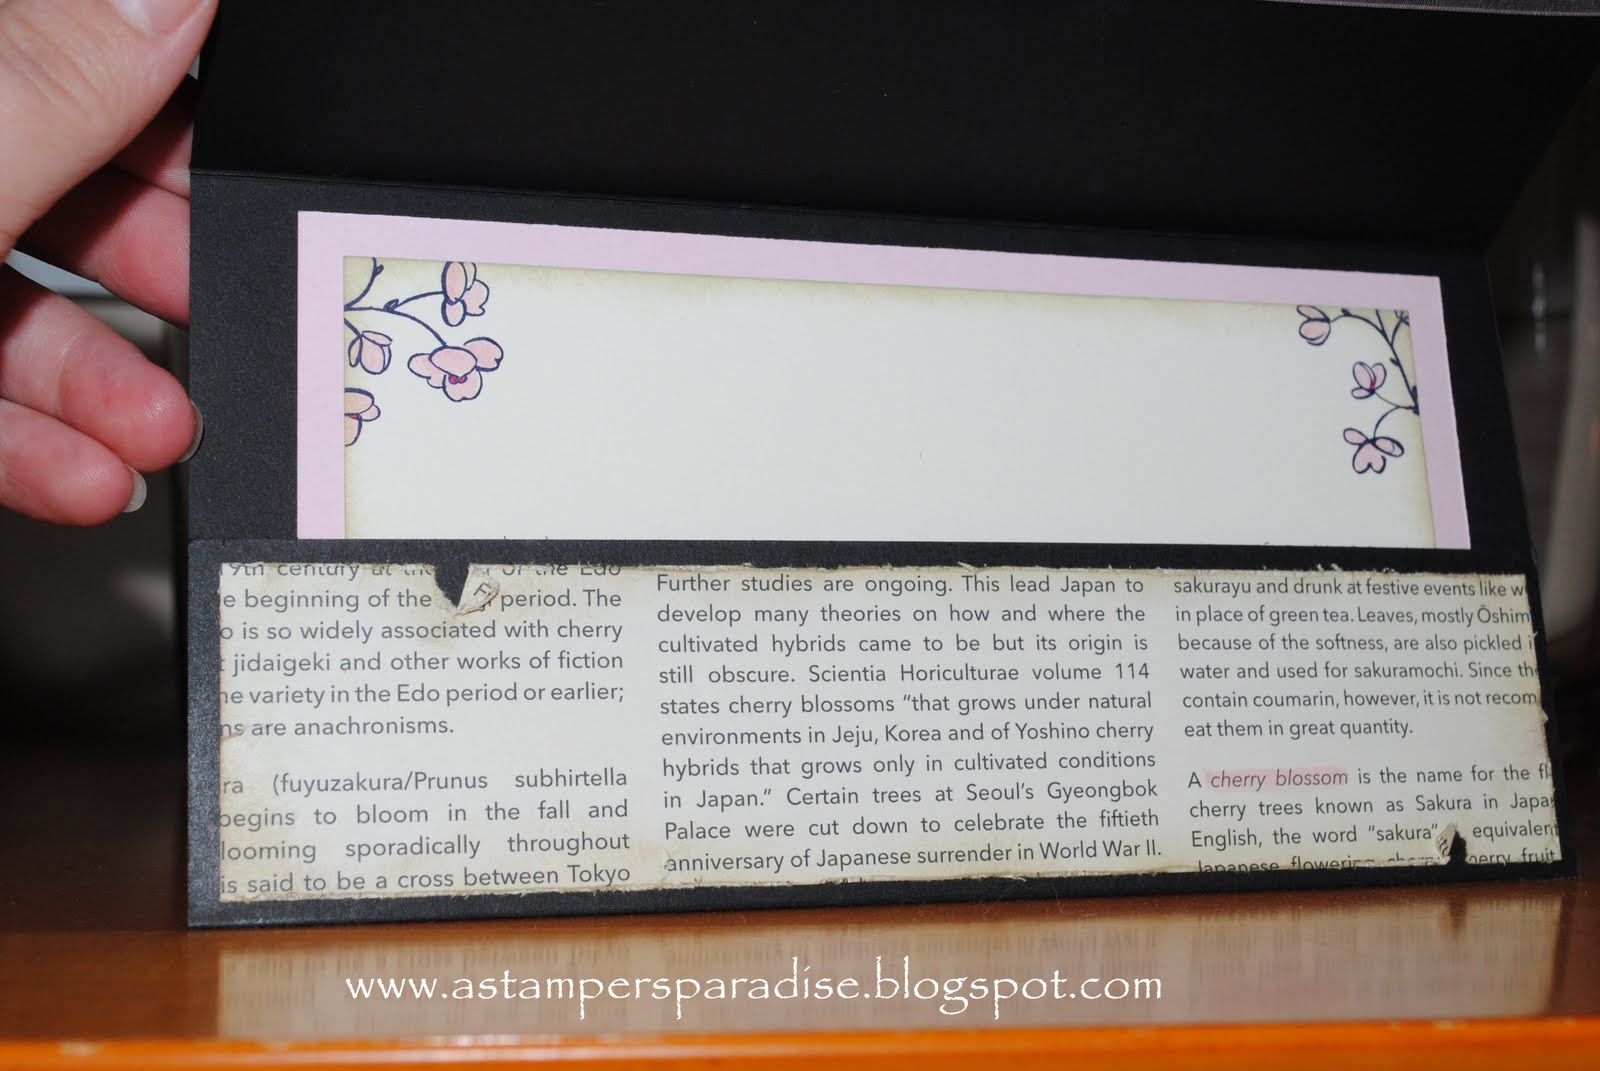
 Here's a shot of the inside. I added a pull out message card inside the pocket and stamped the corners to match. Another strip of DSP finishes off the inside. This worn look is just small tears in the paper (and roughing up all edges), and folding them a little, then sponging them heavily with River Rock ink.
This is the sketch I designed for a fun group I swap with. I design these monthly for the group, and still enjoy it very much. I thought for a while that blog design would be my new addiction, but nope, it's sketches! I do all my sketches exclusively in My Digital Studio.

***Most supplies are SU!***

Stamp: Embrace Life
Paper: Basic Black, Pink Pirouette, Very Vanilla & First Edition DSP
Ink: Basic Black, River Rock, Pink Pirouette, Rose Red


Sunday, July 18, 2010

Make Your Own DSP with Collage Stamping! (Tutorial)

This little beauty is another card I designed for my Hostess Club for our July meeting. It's another one of the 4x8 cards I just recently starting making with a 2" pocket inside. Aside from the ribbon, all product is current SU, the ribbon retired:( My other card using this fold was posted on 7/3, check it out if you didn't see it! What I love about this one, is I decided to make my own DSP! (SU's term...Designer Series Paper). I have stamped my own patterned paper before, but not as quickly or as easily as this. Keep reading!
Here's the inside of the card showing the pocket with the insert pulled out. I left my flowers colorless on the inside, but had some club members color theirs! It was pretty both ways. I love the way this DSP uses the colors I wanted, I didn't have to work around a pre-printed paper! Now, don't get me wrong, I love DSP as much as the next stamper, but sometimes I want it in exact colors, that's where this comes in!

This set is new to the 2010-2011 IBC, it's called Awash With Flowers, and I purchased it Clear Mount. The Block in the picture is 'E'. This set comes in two DVD boxes, one for the outlines, one for the solid images. I took the flowers from the outline case and arranged them on the clear block. I am showing the example on a 2.5x8" strip. This is quicker to do on a full sheet, then cut it down, I am thinking OSW!!! (One Sheet Wonder) Once you have the stamps arranged to your liking, ink them up all at once, here using Basic Gray), and stamp away! So quick! It's easy to continually stamp an exact pattern! No randomness unless you want it!


Once the paper is stamped, I then took each individual solid and inked the colors! I will definitely be making more of my own paper with this set! It would be wonderful to sit down and do a few sheets of Whisper White CS with the outlines and fill in with color when you were ready for it! Talk about a great use of the Clear Blocks and the stamp sets!
*
I hope you'll all try out this method of Collage Stamping!!! It's fun, easy, and what better way to get the most bang for your buck!
*
This card uses:
CS---Whisper White, Basic Gray, Melon Mambo and Daffodil Delight
Ink --- Basic Gray, Melon Mambo, Daffodil Delight, Wild Wasabi and Marina Mist
Stamps---Awash With Flowers, clear block 'E', and A-D
Scallop Trim Border Punch, Melon Mambo Dotted Ribbon
SUO!


Friday, July 24, 2009

Fabulous Friend Flower Pot

So, I sat down last night determined to get some much needed stamp time in. I began by making my coffee, and straightening my craft area just enough to have room to work. Then my craft light fell off of it's stand, crashed into my coffee cup, which poured everywhere! It soaked through 2 brand new packs of cardstock that I just got in, and was getting ready to file, ruining almost every piece! I was livid, yelling at the coffee cup, trying to kill the lamp, and screaming for Jim to bring me some paper towels. You would have thought it was a 'real' emergency with how angry I was! So, that's how my night of stamping began. However, it ended on a much better note. I finally made the Flower Pot card, which is currently a featured tutorial on SCS. I may never make another one, but I love this one! It took me well over an hour, and after all my ruined paper, I was just not feeling it anymore. Maybe if I tried again, I could pull one together much quicker. Below is a shot of the insert pulled out.
Paper: Melon Mambo CS, Razzleberry Lemonade DSP, and Rich Razzleberry CS
Stamps: Flight of the Butterfly, Oval All, and The More the Merrier (new Level 3 Hostess)
Punches: 5-Petal Flower, Scalloped Oval, 1" Circle, Boho Blossom, Eyelet Border, Large Oval
Die Cuts: Big Shot by Sizzix for SU, Little Leaves SU die, Birds&Blooms SU die
Accessories: Sq Fire Rhinestone Brad, Melon Mambo Ribbon, Frosted Lace Stickles, Sponges

Tuesday, March 10, 2009

Another Crimped Envelope

After teaching this technique in my club for Feb, my monthly challenge was for everyone to create one on their own, and bring it in March to show everyone what they came up with. This was mine. The stamp set is Embrace Life, and I watercolored, covered with Crystal Effects and Dazzling Diamonds the flowers, then cut them out. One is stuck on with Glue Dots, the upper one with Dimensionals. The corners are Sizzlets called Architectural Elements, and are a set of 4 photo corners which I love, I ran those through the Big Shot. Colors are Rose Red, Bravo Burgundy, and Old Olive. I left the inside piece sentiment free since I don't know what I want to use this for yet!

Saturday, February 7, 2009

Crimped Envelope Valentine

This was one of the projects I created for my club to make today. The tutorial is on SCS, and when I got my Weekly Inkling, I just knew I had to give this a try. Here it is all put together...


And this is what it looks like open, this shot shows the inside pull-out piece. The pocket card itself is a standard A2 envelope, these are quick, easy, and I love the look of them. I punched a partial scallop circle out of the top open end so the recipient can see the card inside...

Stamps: Heartfelt Thanks, Holiday&Wishes, All Holidays
Paper: SU Medium Whisper White envelope, Riding Hood Red CD, Bella Rose DSP scrap
Ink: Riding Hood Red, Pink Pirouette, Kiwi Kiss
Acc/Tools: Fiskars Crimper from SU, SU Square Scallop punch, SU Scallop Circle punch, 1", 3/4" and 1/2" SU circle punches, SU Glue Dots, Sponges, and paper flowers by Kaiser Scrapbooks.


Thursday, January 22, 2009

My Best Friends Birthday Card...


I am SO lucky to have a wonderful friend who just celebrated her 30th birthday. You know that friend, who I hope everyone has, who is the only one you can tell everything? Well, this is her birthday card from me, and I hope she loved it! This is a pic of the card as well as the tags that fill the two pockets. Below is the card put together and a description of the card and supplies...
I used SU Fall Flowers DSP. The colors in this paper are Soft Sky and Old Olive, I didn't have any Soft Sky, so I used Bashful Blue instead. This card is made using an 8 1/2 x 11 piece of DSP folded and cut to make this double pocket card. Instead of using Sticky Strip to tape the edges together like I normally do, I stuck the sides in my Bind It All, then threaded ribbon through the holes. The flowers on the front are SU Die Cut Blooms, which I LOVE!!! Stamp set is Inspired by Nature for the grass and the flower, Flight of the Butterfly, and the sentiment is from It's Your Birthday. I wrote the personal message on the back of the larger tag.
All items SU except ribbon (source unknown) and pearl on front from Mark Richards. I also used the Round Tab punch (SU) for the top of the first tag. I really like how this turned out, and my friend loved it, so all is well. I hope I still have her in my life 30 more years from now!

Sunday, July 13, 2008

July Swap Card -- Criss Cross


This is one of my favorite card folds, the Criss Cross Card! Supplies needed to make it:
* One sheet of 8 1/2 x 11 CS cut in two pieces 4 1/4x11(Elegant Eggplant here)
* One 4x5 piece of Designer Series Paper (here So Saffron DSP) cut in 1/2 diagonally.
* One piece of 3 3/4 x 5 CS (here Old Olive) for back of insert.
* One piece of 3 1/2 x 4 3/4 CS (here Very Vanilla) for insert.
* One 1 1/2 x 12 strip of CS for band (here Old Olive), I use 11" and glue together under my embellishment. I don't always keep 12x12 on hand, so this is a great shortcut!
* Scraps of CS in the colors you use for punches, ect.
* Ink, stamp sets of your choice (Here Fresh Cuts and Friendship Blooms), adhesive, ribbon (opt), Corner Rounder, and embellishments (brads, etc).
1. Score your 2 pieces of 4 1/4 x 11 CS at 5 1/2".
2. Cut one piece and cut it diagonally from top of score to bottom left corner.
3. Cut the second piece from top of score to bottom right corner.
4.On the back of ONE of these pieces, generously apply your adhesive.
5. Line pieces up, with glued piece in the front, make sure both flap pieces are down, the entire bottom should be a straight piece. Press together.
6.Take the DSP that you cut in 1/2 diagonally and adhere one piece to each flap of the card.
7. Add a strong adhesive (I use Sticky Strip) on the bottom of the middle panel, fold one of your 'traingles' in to begin to form the card.
8. Add more strong adhesive to the bottom edge of the 'triangle' piece that will be your front flap, press down, now you have the Criss Cross part done!
9.Take your CS pieces for the insert, and using a corner rounder, punch the top corners of both pieces.
10. Stamp your images on the top portion of the neutral CS, when finished, glue neutral CS to your color piece, leaving a little bit of the bottom CS showing.
11. Add a tab (Round Tab used here) to pull the insert out, and add your other embellishments as desired.
12. Take your long, 1 1/2 CS and fold over card to make your belly band, attach with adhesive.
13. Use punches (here 5 Petal Punch, Scallop) to decorate the front of your band, and wrap the band with ribbon if desired.
14. Done!
***I use the directions based on the tutorial from splitcoaststampers, these are my words, however, I use the basic directions provided on this site. My directions are changed to explain exactly how I made the card pictured.
I hope you all enjoy seeing this card, and learning how to make one on your own! Feel free to leave comments or questions.